There are many different deck archetypes in Marvel Snap that meet a variety of playstyles players want in a card game. Some decks are meant to deal massive damage, others destroy their own cards and deceive opponents, and then there are discard decks. These are some of the most impactful decks and are shaping the meta.
Here is a quick guide on how discard decks work as well as the best discard decks for all pools in Marvel Snap.
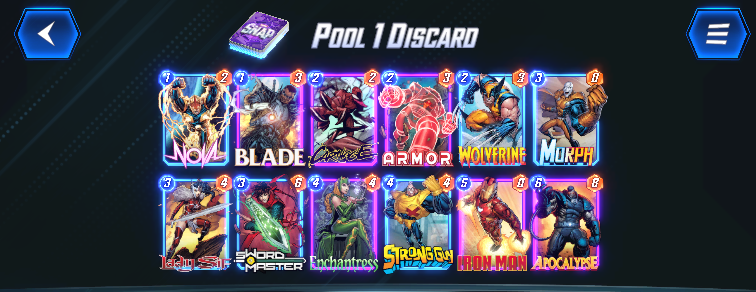
Pool 1

Discard decks in Pool 1 are very simple to pilot and are a perfect entry point into seeing what the mechanic is capable of. The cool thing is that the arguably best discard card in the entire game is obtainable in Pool 1, which is Apocalypse. Apocalypse is everything the archetype could ever ask for. It’s a card that never actually leaves the hand which makes the drawback from playing a discard strategy obsolete seeing as a player will not lose in card advantage. And on top of that, Apocalypse is a win condition as he can get very big before a player drops him on Turn 6.
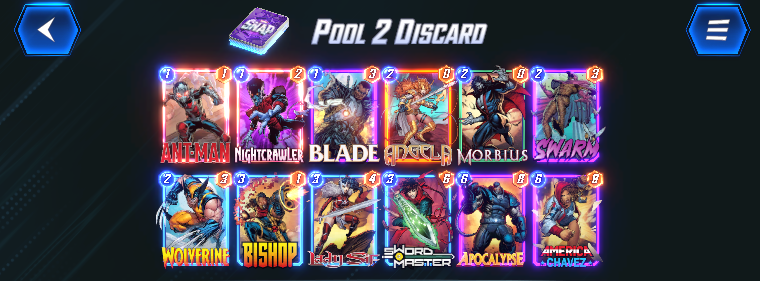
Pool 2

In Pool 2, players get access to two more very impactful discard cards the first being Swarm. Outside of Wolverine and Apocalypse in Pool 1, there aren’t any cards that players will want to actively discard from their hands up to this point. Swarm gives players a very strong third target just in case they don’t have Wolverine or Apocalypse in hand. When Swarm is discarded, two copies of himself get put back into the hand and now cost zero giving the player essentially six power on the board for free at anytime they want. Morbius is also a solid addition as he gets more power for every card discarded.
Pool 3

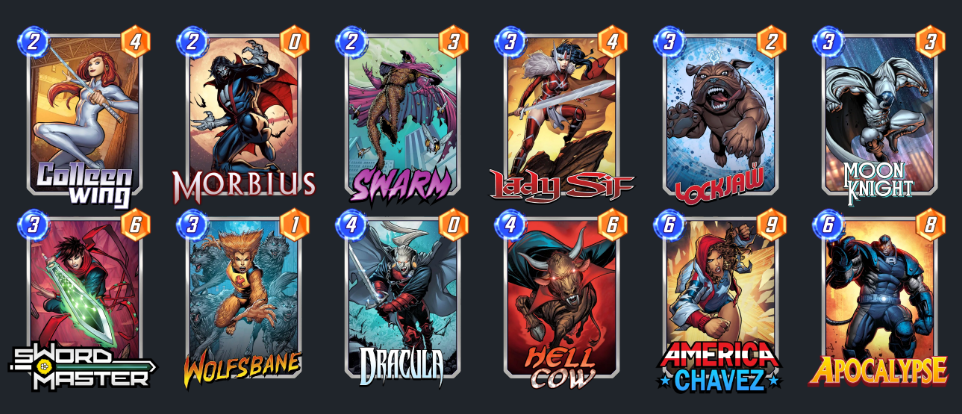
The real fun starts in Pool 3. Once players get into Pool 3, decks get more complex and this is an example.
This deck isn’t a typical discard deck. Instead, this deck plays more like a combo deck. The goal of this deck is to abuse Lockjaw. Lockjaw has the effect of whenever a card is placed onto the board, swap it out with one from the deck. This allows players to get as many discard cards into rotation which makes Apocalypse a monster. And the best part is that players don’t actually need to spend their Turn 6 playing it because Dracula has an effect that activates only at the end of the game.
At the end of the game, Dracula discards a card from the player’s hand and gains that much power. This will always discard Apocalypse as the deck is designed to only have Apocalypse as the only card in hand at all times.


Published: Dec 3, 2022 10:40 am